

Overview :
In most cases, If you are running an eCommerce store based on WordPress/woo-commerce, you would have come across a requirement where you need to send a WhatsApp message using Whatsapp automation to your customers for these 2 scenarios.
1. When a new order is placed
2. When the order is completed
Firstly, In the case of the new order, by sending a WhatsApp message to the customer we will be able to acknowledge the order and inform the customer that the order is getting processed. Secondly, In the case of a completed order, we can send the tracking details as part of the Whatsapp message along with the information that the order is shipped. And both these scenarios can be done by Whatsapp automation on the client-side absolutely free.
Concept :

The concept we will use is, during both these scenarios the admin of the online store will receive emails from the woo-commerce and the Whatsapp automation will use those emails to extract the data and formulate WhatsApp messages to be sent to the customers automatically.
Prerequisites for Whatsapp automation :
- A fully running ECommerce store built on WordPress/Woocommerce where customers can place orders
- A computer or a laptop connected to the internet
- MS Outlook installed and configured. I am using 2007 version
- A Whatsapp number
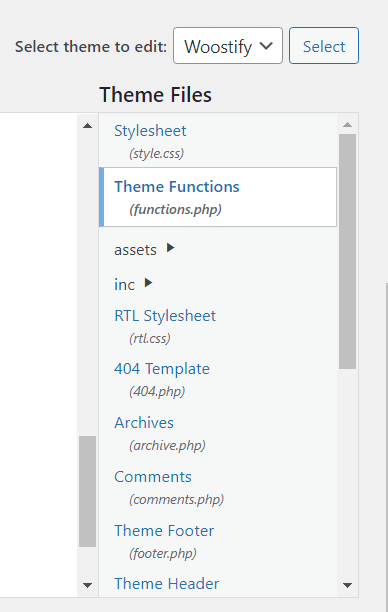
Note: I am using woostify theme on my site and this automation is tested only on this theme.
Steps TOC :
Step 1: WA Desktop installation and linking
Step 2: Woocommerce setting changes
Step 3: Plugins installation, activation, and configuration
Step 4: MSOutlook VBA Automation
Step 5: Testing the use cases
Step 1 for Whatsapp automation : Whatsapp Desktop version installation and linking
Firstly, Download the Whatsapp desktop version from HERE
Secondly, Install it on the laptop/computer. Link the Phone having WhatsApp to the desktop version of WhatsApp. You can do that by following these steps a-d listed below.
a. Open WhatsApp on the phone
b. Click Setting and then click Link device.
c. Scan the QR code and you are all set
d. Try sending a message from the WhatsApp desktop version to any other number to test if the connection is working.
Note: In the version starting from 2.2140.12, the mobile device that is linked to the laptop need not be connected to the internet once the initial linking is done successfully.
Go back to Steps TOC Section
Step 2 for Whatsapp automation: Woo-commerce setting changes
a. Go to WordPress dashboard
b. Click Woocommerce->Setting and click Emails tab

c. Let’s configure the New Order email. Click the Manage button on the right of the New order

Turn on the “Enable this email notification” check box
In the Recipients field, enter your admin email for which the MSOutlook is configured with.
Fill the Subject, Email heading, Additional content, and Email type fields as same as the image listed above.
After that click Save Changes button
d. Click the Emails tab again, Now let’s configure the Completed order email settings.
Click the Manage button on the right of the Completed order

Firstly, Turn on the “Enable this email notification” check box
Secondly, Fill the Subject, Email heading, Additional content, and Email type fields as same as the image listed above.
Most importantly, there is no Recipients field in this window to set our admin email. By default, the email for completed order will only be sent to the customer email specified in the order.
However, In order to overcome this constraint, we have to modify the customer-completed-order.php.
As a next step, log in to your hosting CPanel and using the File Manager, navigate to /public_html/wp-content/plugins/woocommerce/templates/emails folder and locate and download the customer-completed-order.php .
Open this file in a text pad and add the following 3 lines to the file towards the end of the file and save the file.
do_action( ‘woocommerce_email_order_details’, $order, $sent_to_admin, $plain_text, $email );
do_action( ‘woocommerce_email_order_meta’, $order, $sent_to_admin, $plain_text, $email );
do_action( ‘woocommerce_email_customer_details’, $order, $sent_to_admin, $plain_text, $email );
Then, navigate to your themes folder.
This can be done by clicking public_html -> wp-content -> themes -> woostify -> woocommerce -> emails
Click the Upload button in the toolbar and select the customer-completed-order.php you just modified
e. Ensure a whatsapp 10 digit number is provided by the customer
Now, let us ensure that the customer always enters a 10 digit phone number in the Billing Phone Field on the Check out page. We can use a simple script to validate this. Go to your WordPress dashboard, Click Appearance -> Theme Editor. Click on the Theme Functions ( functions.php ) and add the following snippet to this file
// Limit Woocommerce phone field to 10 digit number
add_action(‘woocommerce_checkout_process’,’TSB_custom_checkout_field_process’);
function TSB_custom_checkout_field_process() {
global $woocommerce;
if(!(preg_match(‘/^[0-9]{10}$/D’,$_POST[‘billing_phone’]))){
wc_add_notice(“please enter valid 10 digits phone number”,’error’);
}
}
This script will display an error to the user if the user does not enter a 10 digit number during check out.
Finally, Click the Update File button.
f. Display Country name in the Billing address as part of the email
As we are in the Theme Editor, we will use one more snippet to work out another constraint. By default, when the system sends an email, be it for a new order or a completed order, the country will not be displayed in the billing address section of the email. Why we need the country information is to add the right country code to the WhatsApp phone number for sending the messages. If you are selling only in India, then this step is not required.
Finally, add this following snippet in the functions.php and click the Update File button
add_filter( ‘woocommerce_formatted_address_force_country_display’, ‘__return_true’ );
Go back to Steps TOC Section
Step 3 for Whatsapp automation : Plugins installation, activation, and configuration
In short , We require 2 FREE Plugins, usage and settings are explained below.
Plugin # 1 :
Most importantly, the whole automation works only if the user enters a mobile phone number as part of the billing phone details during check out. However, it’s better to let the customer know that he/she has to enter a WhatsApp mobile number in the Billing phone field in the checkout. For this, we need to use a free plugin Checkout Field Editor for WooCommerce
Firstly, Go to the WordPress dashboard, Click Plugins -> Add New. Secondly, Search for Checkout Field Editor for WooCommerce in the search box and install and Activate the plugin. The author’s name is ThemeHigh.

Once it is installed and activated, click settings on the plugin.

This will bring the below-listed window, Click Checkout Fields tab, and then Billing Fields

However, We are interested in billing_phone field. Click the Edit button next to the billing_phone field.

In short, Keep the above-mentioned settings, note that in the placeholder field we are using the text to let the user know that he/she has to enter the 10 digit WhatsApp number. Click Save & Close button
Plugin # 2 :
Most importantly, When we sent a WhatsApp message once an order is completed, it would be great if we can share the tracking details also as part of the message using WhatsApp automation. The plugin Advanced Shipment Tracking for WooCommerce is a great one to set the tracking details in the completed order and thereby propagate that information in the email and from there the WhatsApp automation can extract the tracking details. Let’s see how this plugin is installed and configured.
Go to WordPress dashboard, Click Plugins -> Add New. Search for Advanced Shipment Tracking for WooCommerce in the search box, install and Activate the plugin. The author’s name is Zorem.

Once it is installed and activated, click settings on the plugin.

In the Add Tracking order Action field, add Completed, Partially Shipped, and Updated Tracking
Click Save & Close button.
Next, click Shipping Providers tab.
In the Search by provider/country text box, type India and hit search. You should be able to see the various shipping providers supported in India. Toggle the Switch on the right side of the provider to ON based on your business need. Do this exercise for all the countries you are shipping to and turn ON the shipping providers for the respective countries. The changes will be autosaved and you can come out of the settings tab once you are done.

Go back to Steps TOC Section
Step 4 for Whatsapp automation : The VBA script for MS Outlook
In this step, we need to use the VBA script for MS Outlook for Whatsapp automation which has the following functionality.
a. The script will get triggered when a new email is received in the Inbox
b. Parses the email subject and decides whether its a New order or a completed order or something else
c. if it’s a new order or a completed order, extracts the required information from the Email body and generates a WhatsApp message and invokes the desktop WhatsApp application and sends the message.
Let’s install the script in your MS Outlook application.
Open the MS Outlook application on your computer/laptop. Firstly, we need to enable macros. To do this, click the Tools menu -> Trust Center. A dialog pops up, click the Macro Security on the left pane. Click the last option and click the OK button.

Next, Press ALT + F11, this will open the Microsoft Visual Basic For Applications Editor. On the left pane, double click on ThisOutlookSession and you will get a blank editor on the right pane.

Download the file ThisOutlookSession.txt that has the VBA code from HERE. Open it in a text editor.
Search for the text [Tshirtbuy] with an exact match. You will find 6 such occurrences in the code. This is the [{site_title}] for my WordPress site. We used this macro in the Email subject in the woo-commerce email settings. We need to replace [Tshirtbuy] with your site title.
To find which is the{site_title} for your WordPress site ,
Go to the WordPress dashboard, Click Appearance->Customize from the left side panel.
Click Site Identity.
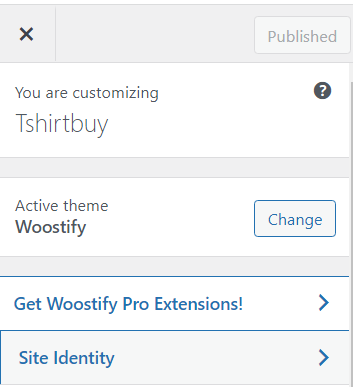
Add the text you want to reflect your site identity in the Site Title text box and Click Publish Button.

Now you have the site title for your site, replace the [Tshirtbuy] text inside the square brackets with your site title. Copy the modified code and paste in the right pane. We are done with the ThisOutlookSession
Now let’s create a module by right-clicking the Modules in the left pane. Insert-> Module
Name the module as Module1

Download the Module1.txt that has the VBA code from here and open the code in a text editor.
Search for E:\Business\T-Shirt\Tshirtbuy.com\Marketing\OrderStatusImages.xlsx . You need to modify the path based on your machine. Once the path is modified, double click Module1 paste in the right pane.
Click the Save Button in the tools bar of the Microsoft Visual Basic For Applications Editor so that the data is saved.
The OrderStatusImages.xlsx can be downloaded from HERE.
For instance, there are 2 sheets in this workbook. Sheet1 and Sheet2. However, You need to keep the same sheet names to make this automation work. These 2 sheets have images. Sheet1 tab has the image for the new order and sheet2 has the image for the completed order. The images are specific to my online store, you can create your own images and paste them into these 2 sheets. The WhatsApp automation will send these images also to the customer along with a text message.


For this code to work, we need to reference certain system libraries, to do that Click Tools -> References menu in the Microsoft Visual Basic For Applications Editor.
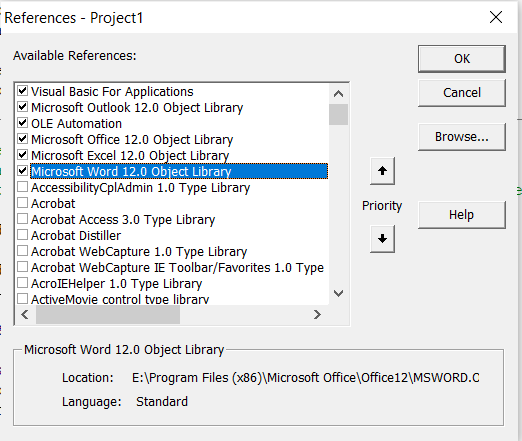
Check all these libraries and click OK.
Go back to Steps TOC Section
Step 5 for Whatsapp automation : Test the use cases
New Order :
Submit a new order just like a customer.
See an email is received in the inbox of your MS Outlook
See if the automation works. For example, If this works, you will see a WhatsApp message and an image sent like this below in the desktop WhatsApp application.

See the text, TSHIRTBUY is my site title and you will see your site title and your order #.
Completed order :
Go to your WordPress dashboard. Click Woocommerce-> Orders
Click an order that needs to be marked as completed.
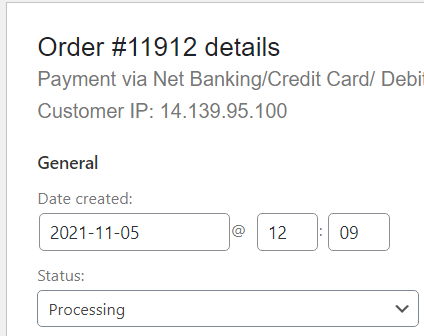
Change the status from Processing to Completed
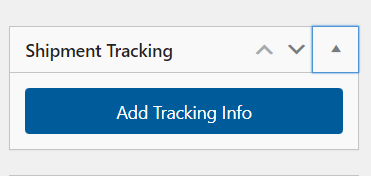
On the right pane in the Shipment Tracking widget, click Add Tracking Info.
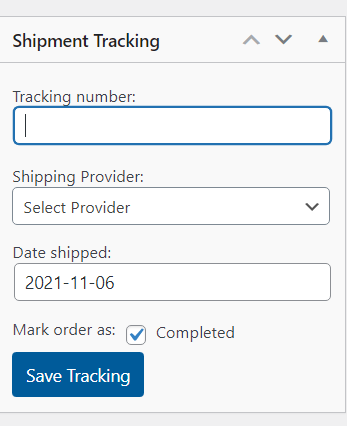
Enter the tracking number and select the provider and click Save Tracking button.
This will trigger an email to the customer as well as the admin.
See if the automation works. For example, If this works, you will see a WhatsApp message and an image sent like this below in the desktop WhatsApp application.
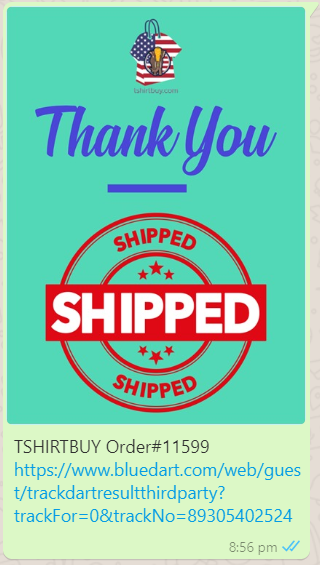
See the text that has the order # and the shipment tracking URL.
That completes this automation using VBA and Whatsapp. Thanks for reading it through. If you find any issues in getting this implemented on your site, send me an email ghadithrissur@gmail.com
Please consider subscribing to my youtube channel if you would like to watch this type of useful video.
https://youtube.com/channel/UC6zn-vcm7FSKUYzXemN72Yw?sub_confirmation=1

